

We LOVE our Mercedes Sprinter. She came to us with a little wear, but if you have the right tools, some decent skills, and a little time, you can afford to take on some of the wear and save some cost up front.
"Mercy," yeah, we name all our vehicles, was missing three of the critical hard mount points needed to secure stuff to the floor of the van. Our kits in development rely on these points to create the strong base for everything that goes in the van. One of the key engineering concepts we have focused on is to minimize the customization to the van needed to install our kits. If we can keep the number of holes needed to drill, panels needed to cut or any other modification to the van itself, we believe it will lend to a quicker and more efficient install without depreciation of the van itself.
Our Mercy was actually missing two of the front hard mount points and one of the rear. We will need to repair all of them.
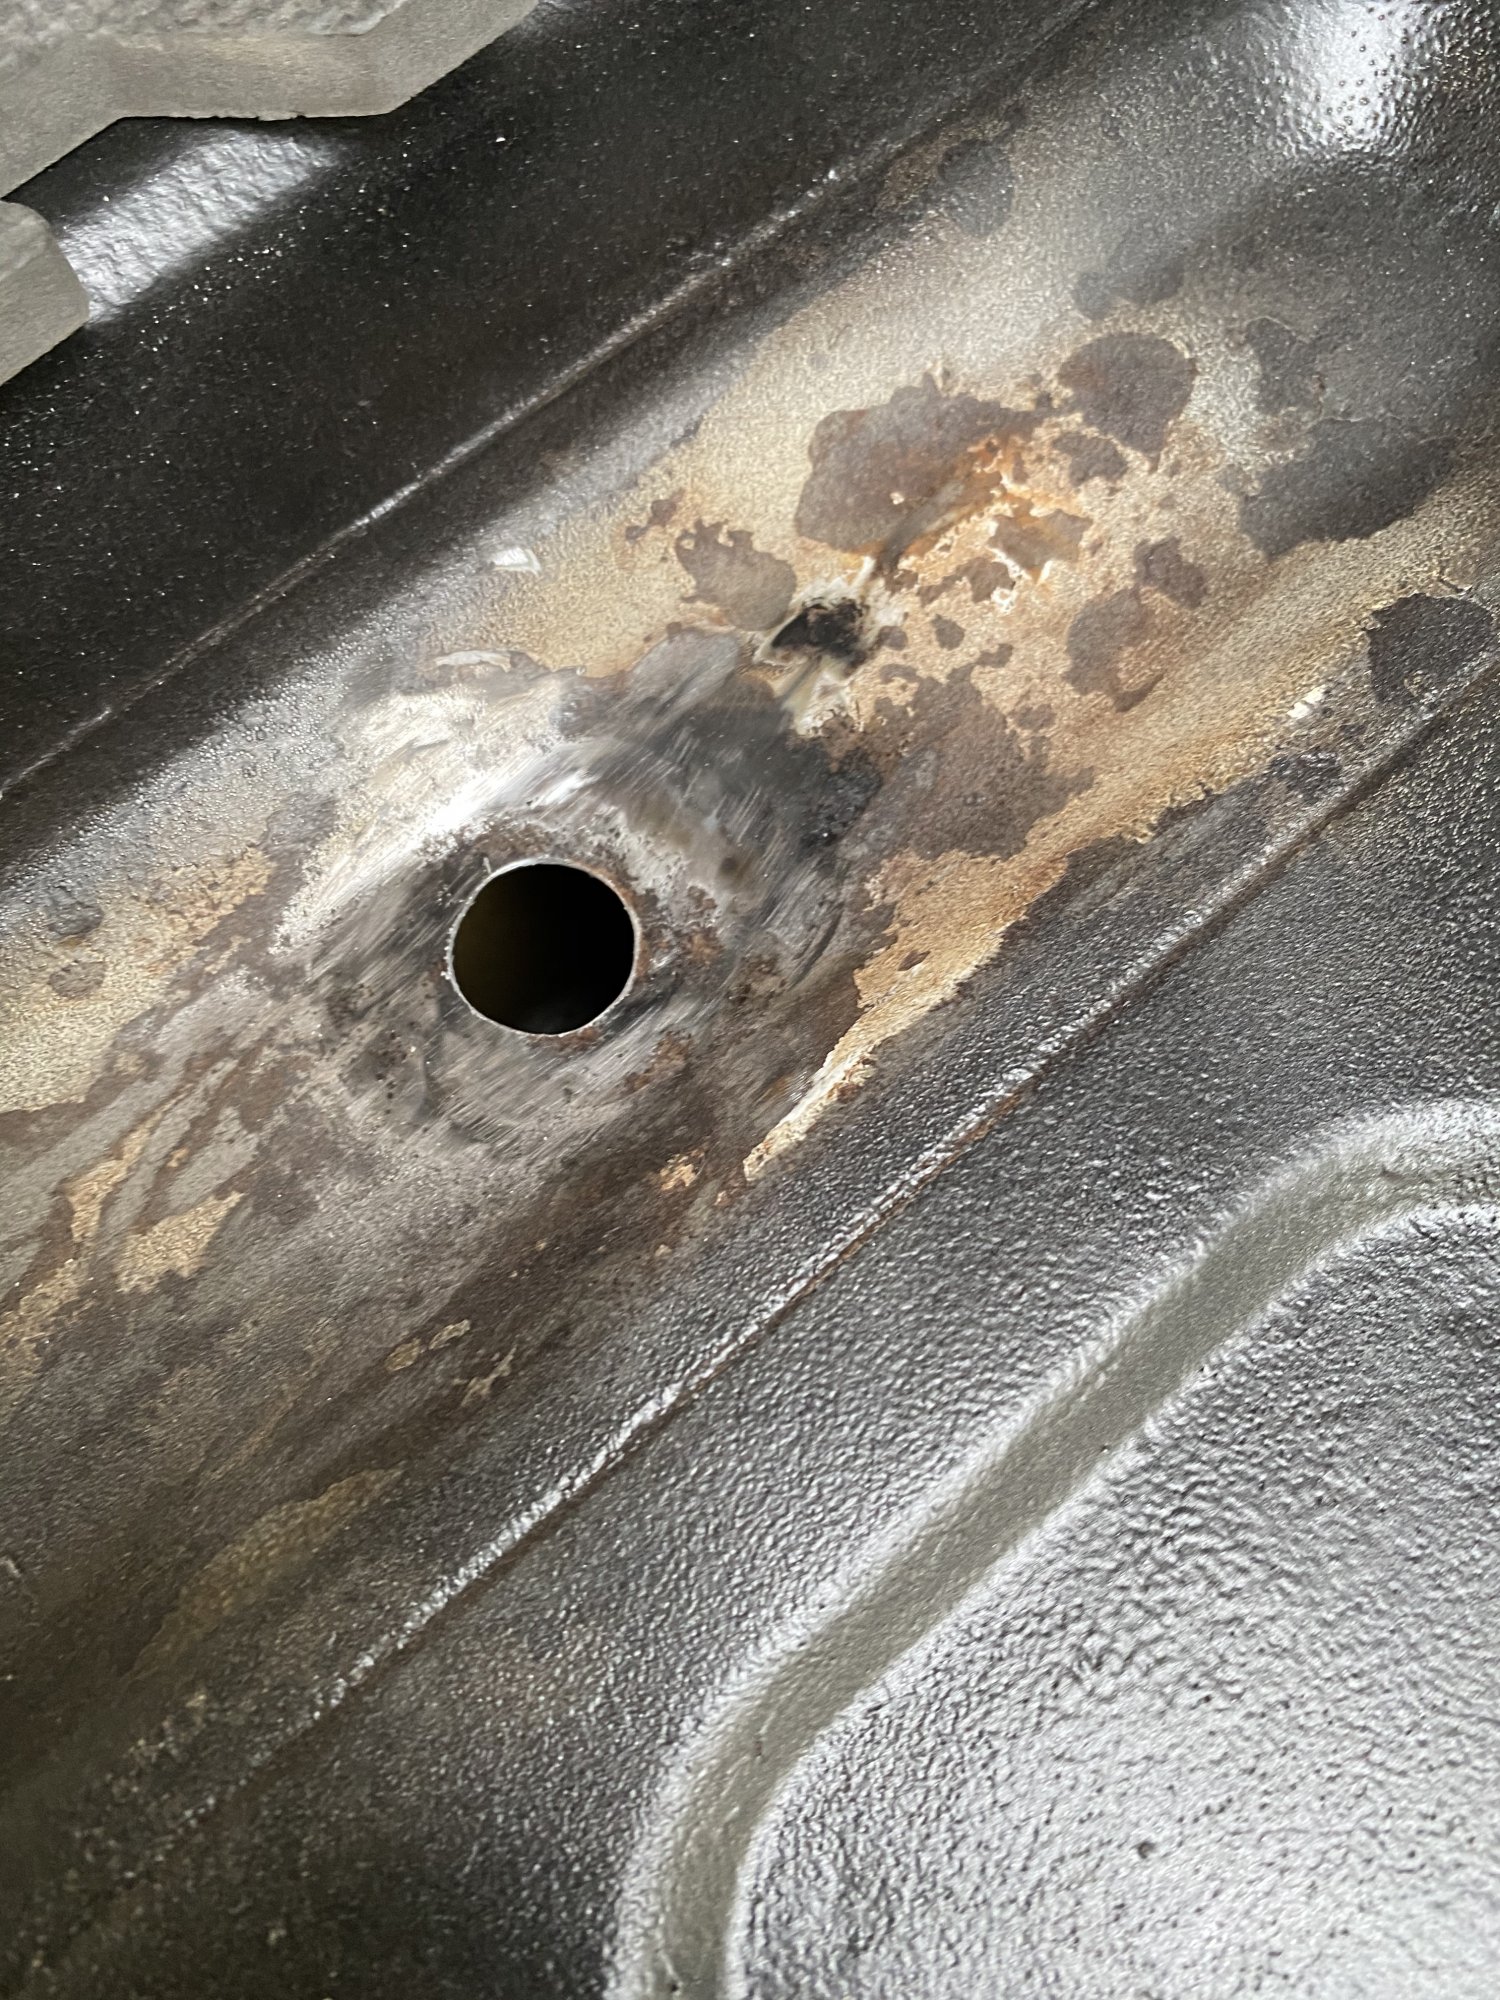
First thing I did was to assess how bad the damage was. We had determined that in her previous life as a work van, a lot of spills had occurred and worked their way under the factory hard floor. The hard mount points are set up in the recessed ridges of the floor and a prime place to collect any spills. Two points were simply rusted away and one had been torn out.
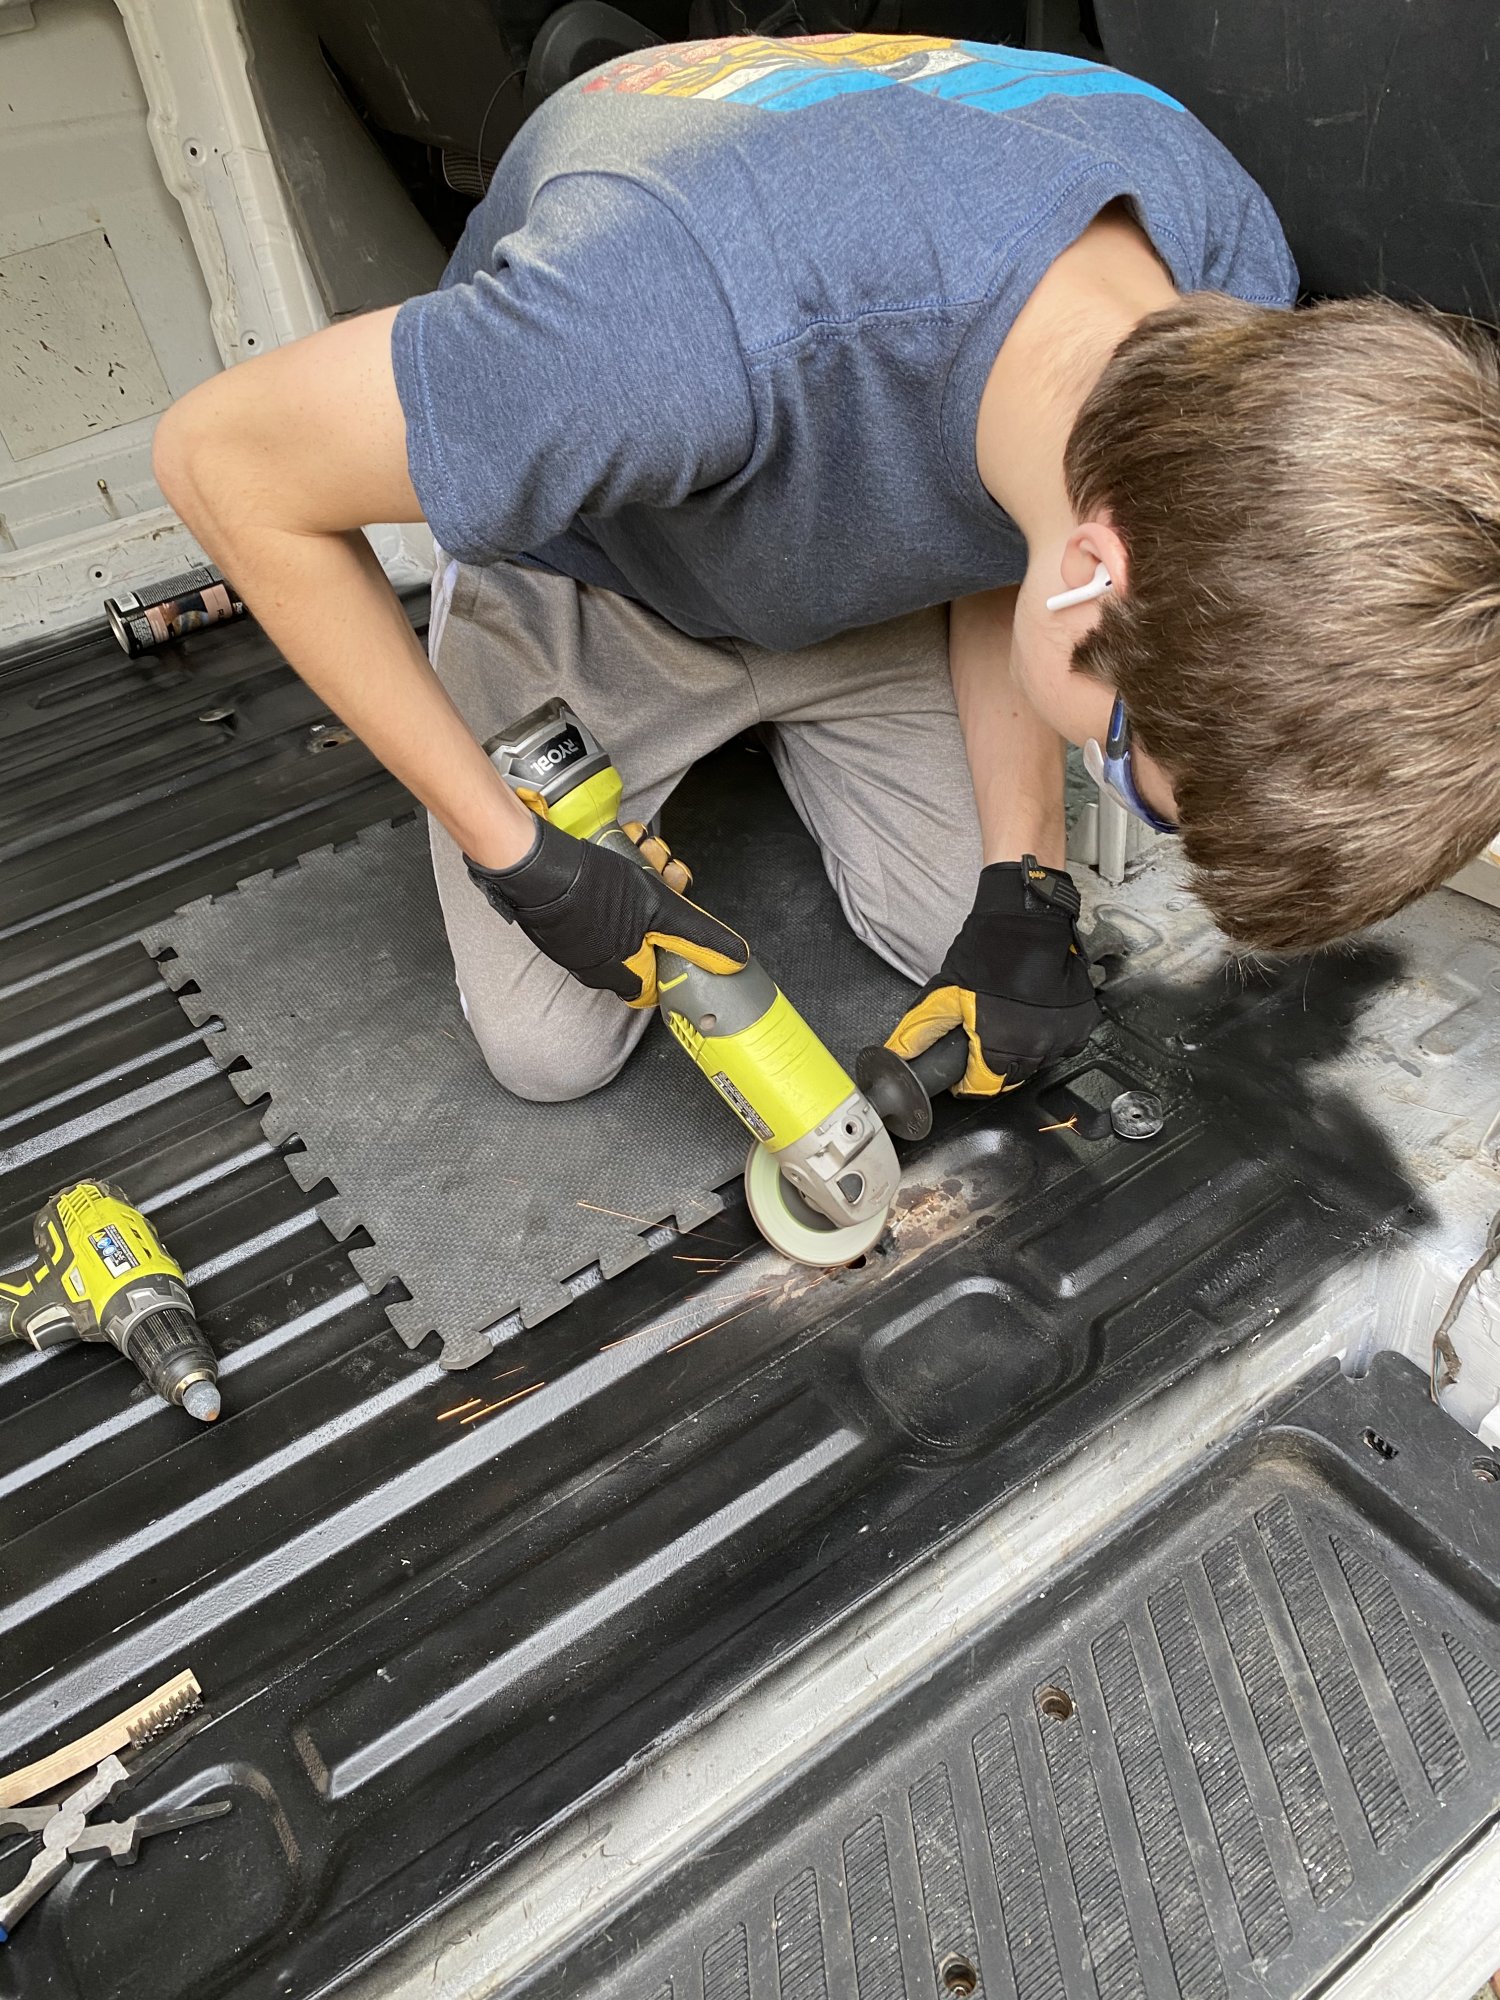
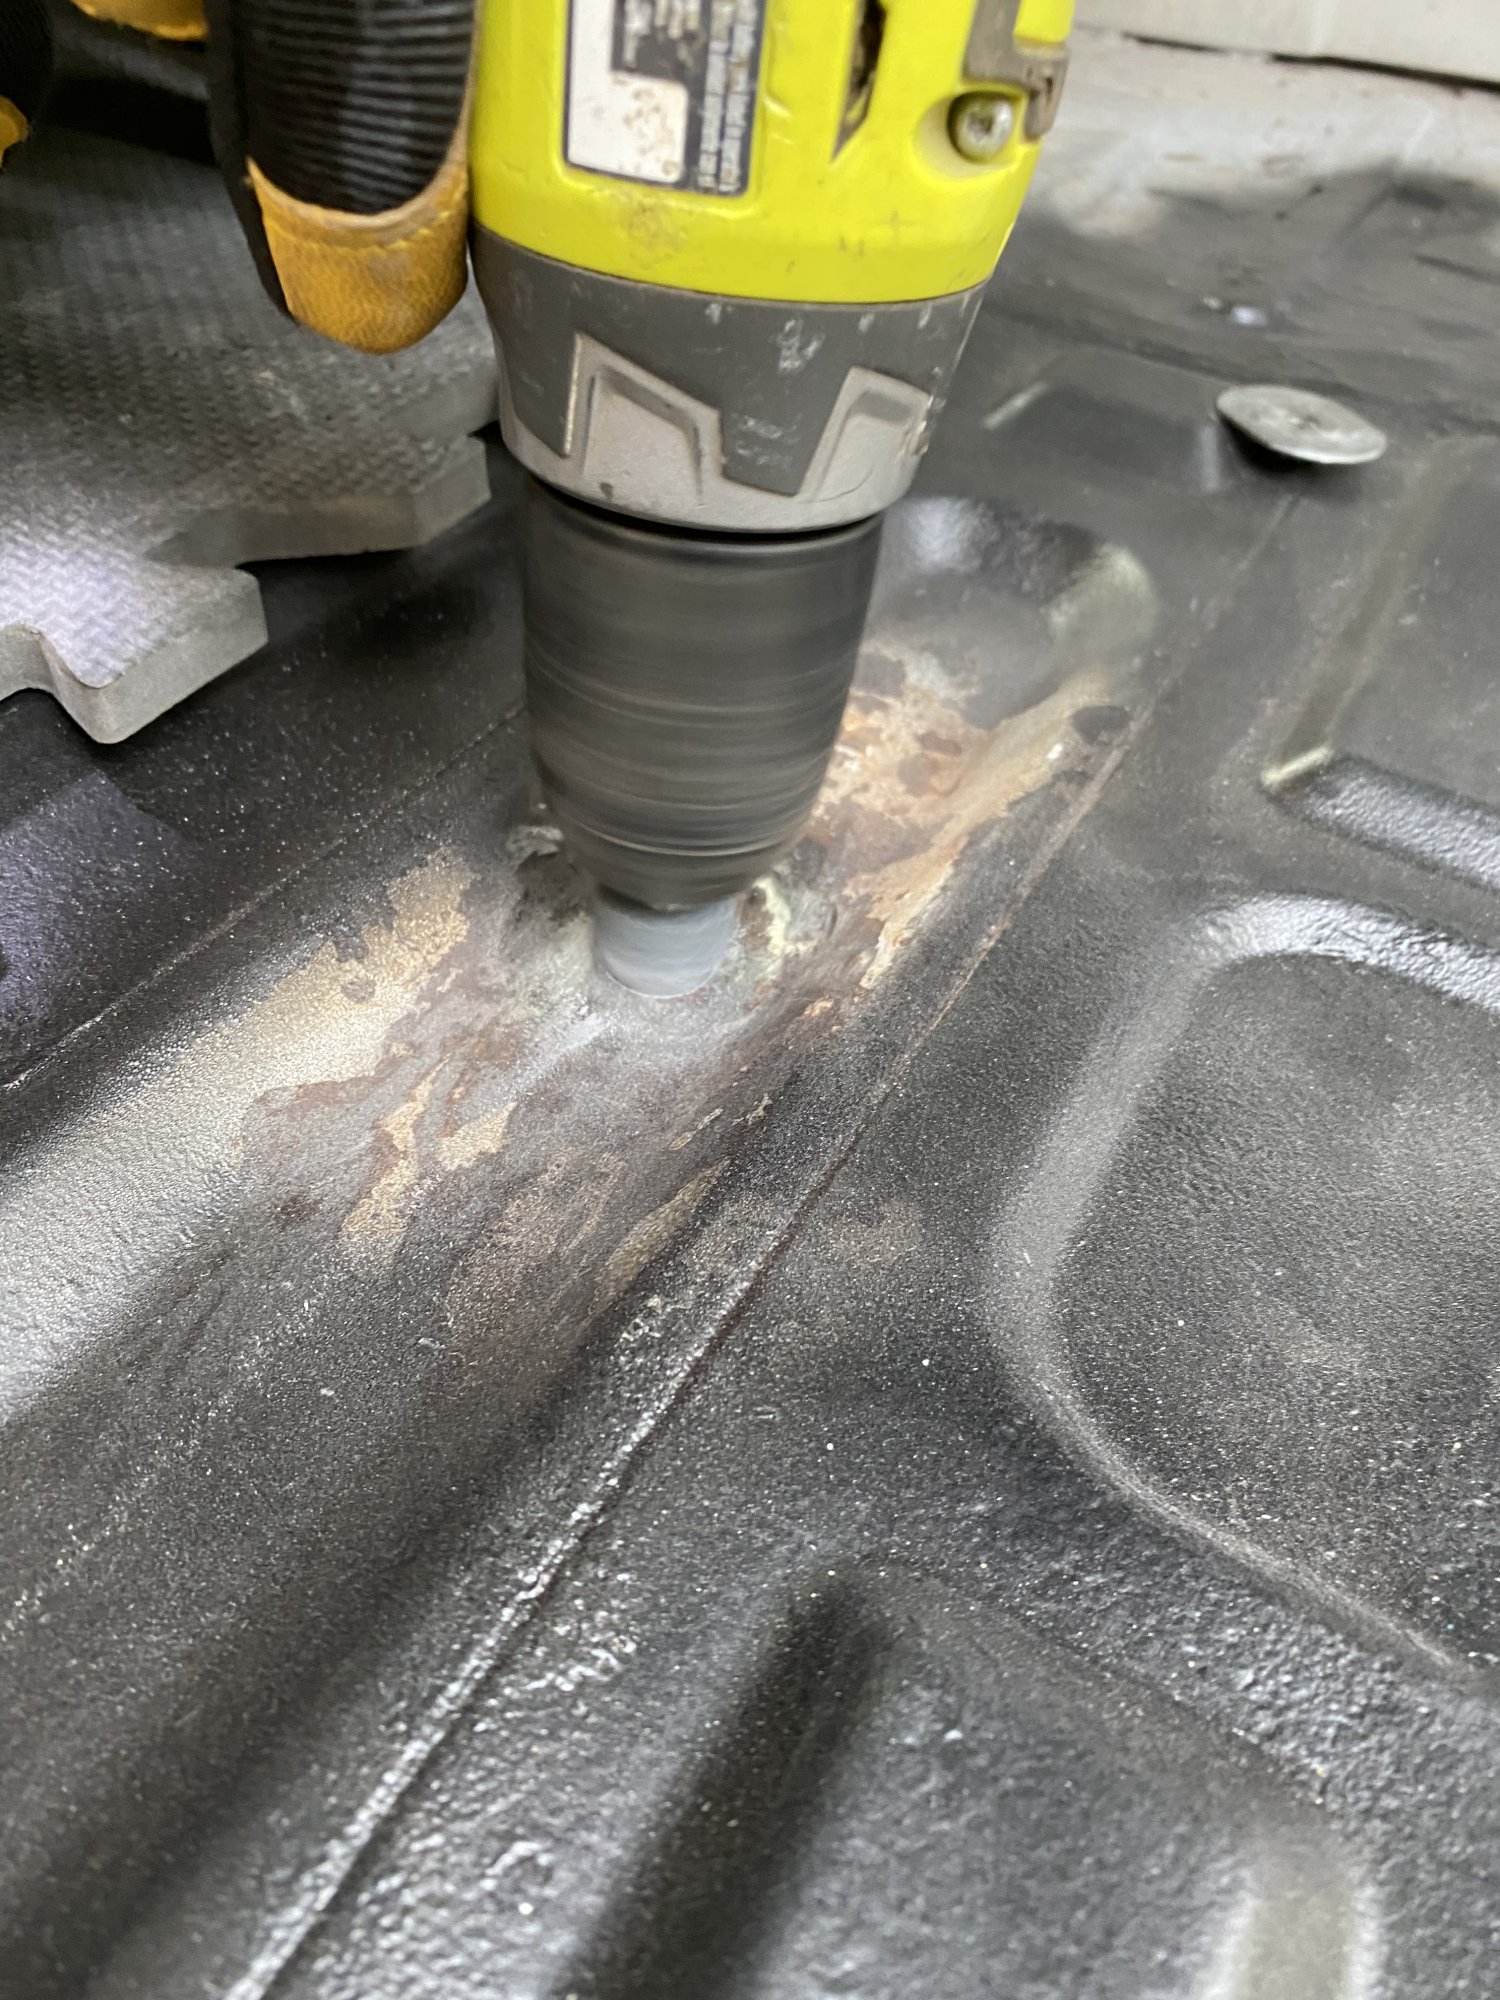
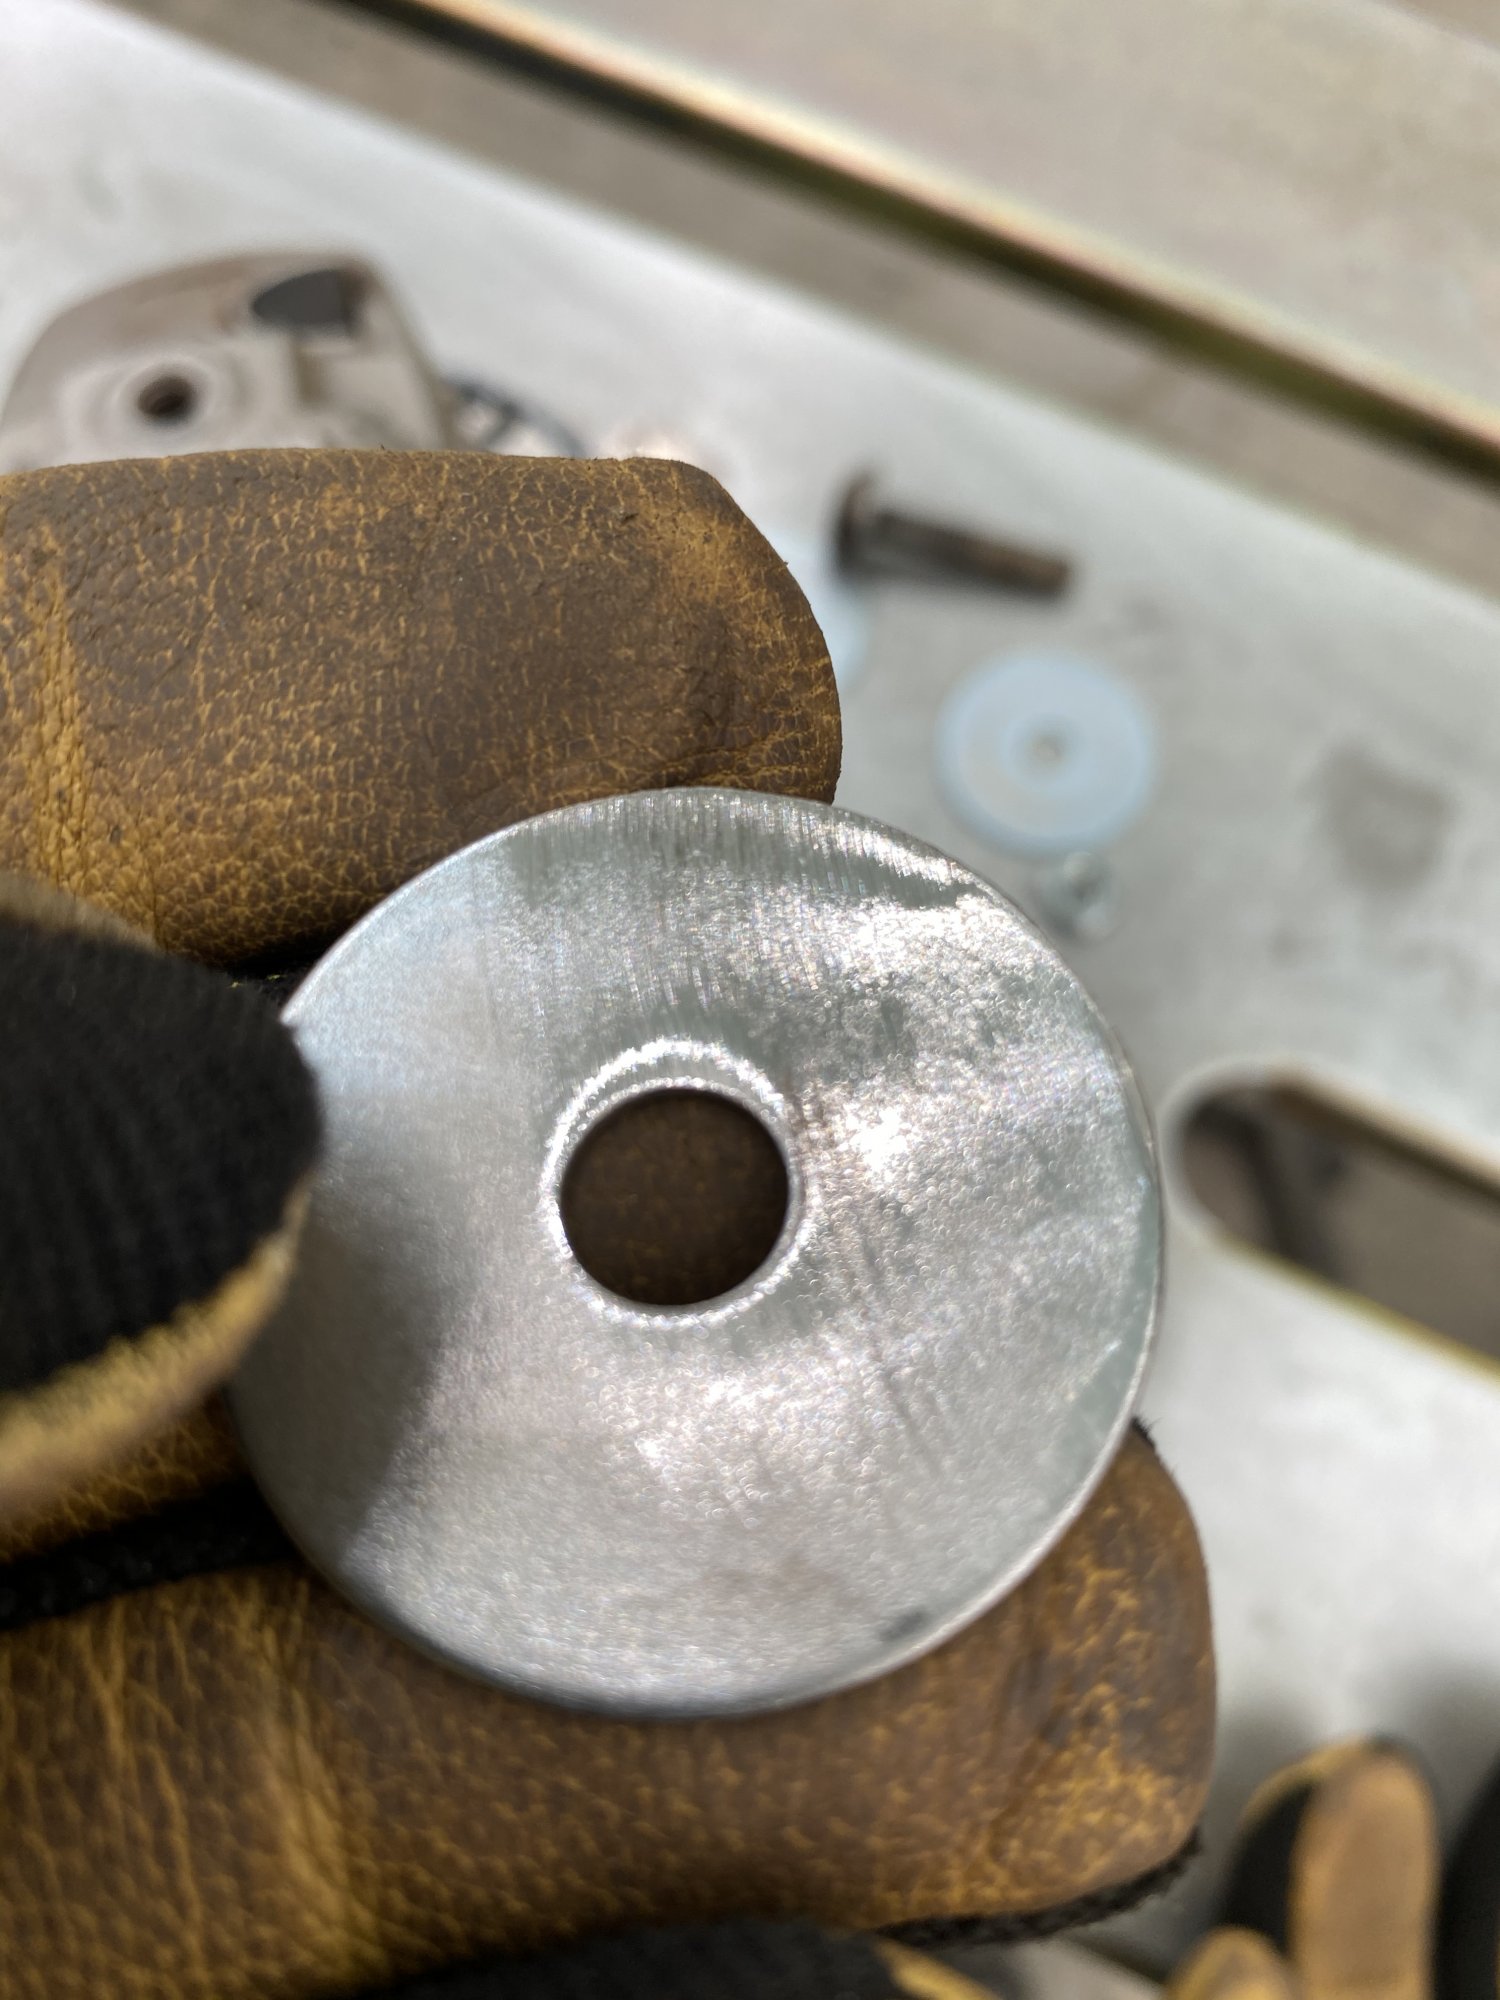
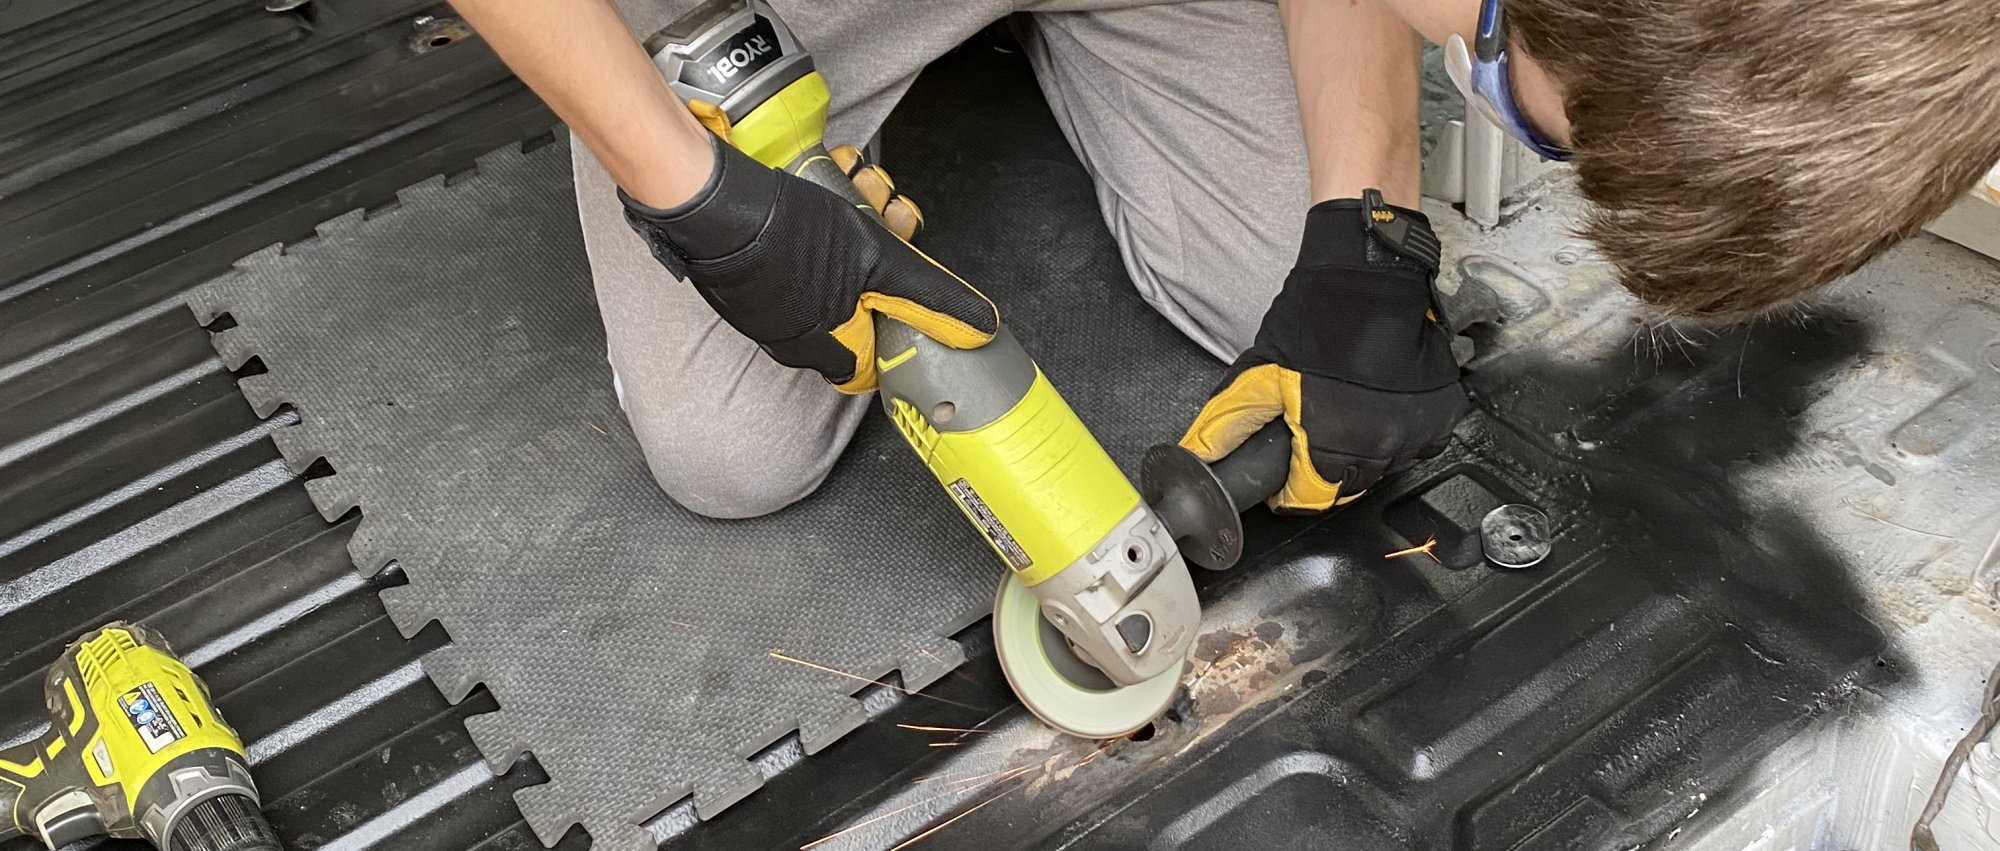
I set my son to task to grind out the rust around the two front points while I took a closer look at the rear point that had been ripped out. We made sure that we kept the holes round and uniform in position so when we align our new points, they will be as close to the factory position as possible. The cleaned out holes were about 5/8” in diameter to make sure we had clearance for the hex nuts and that any weak metal had been removed. By allowing the nut to be BELOW the floor of the van, I can more closely match the original hard mount points.
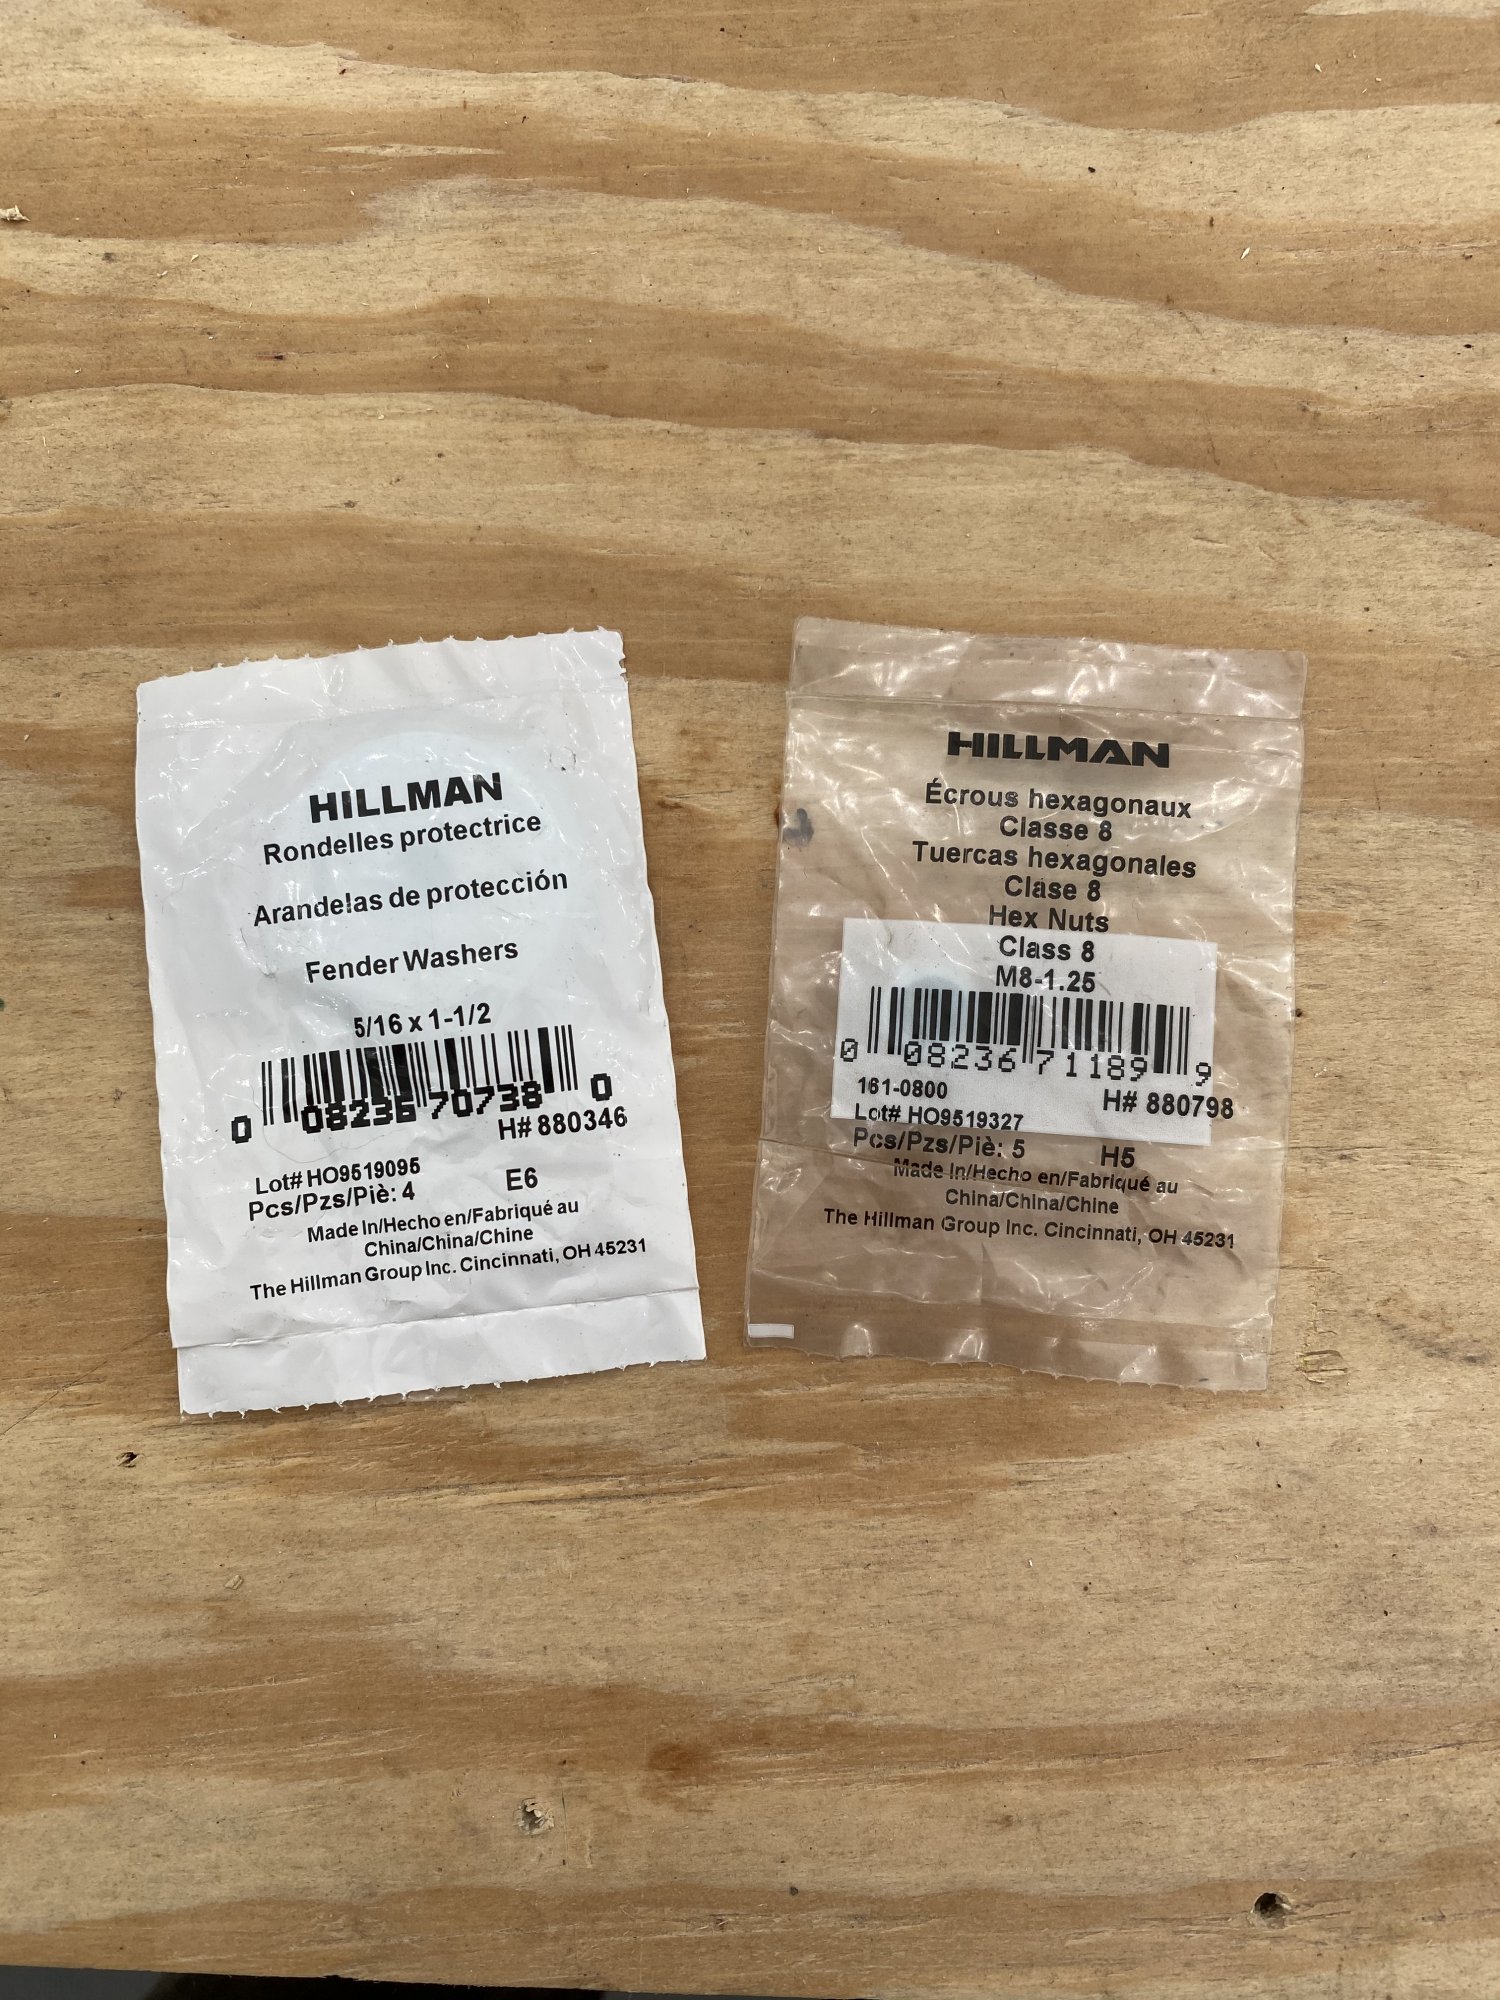
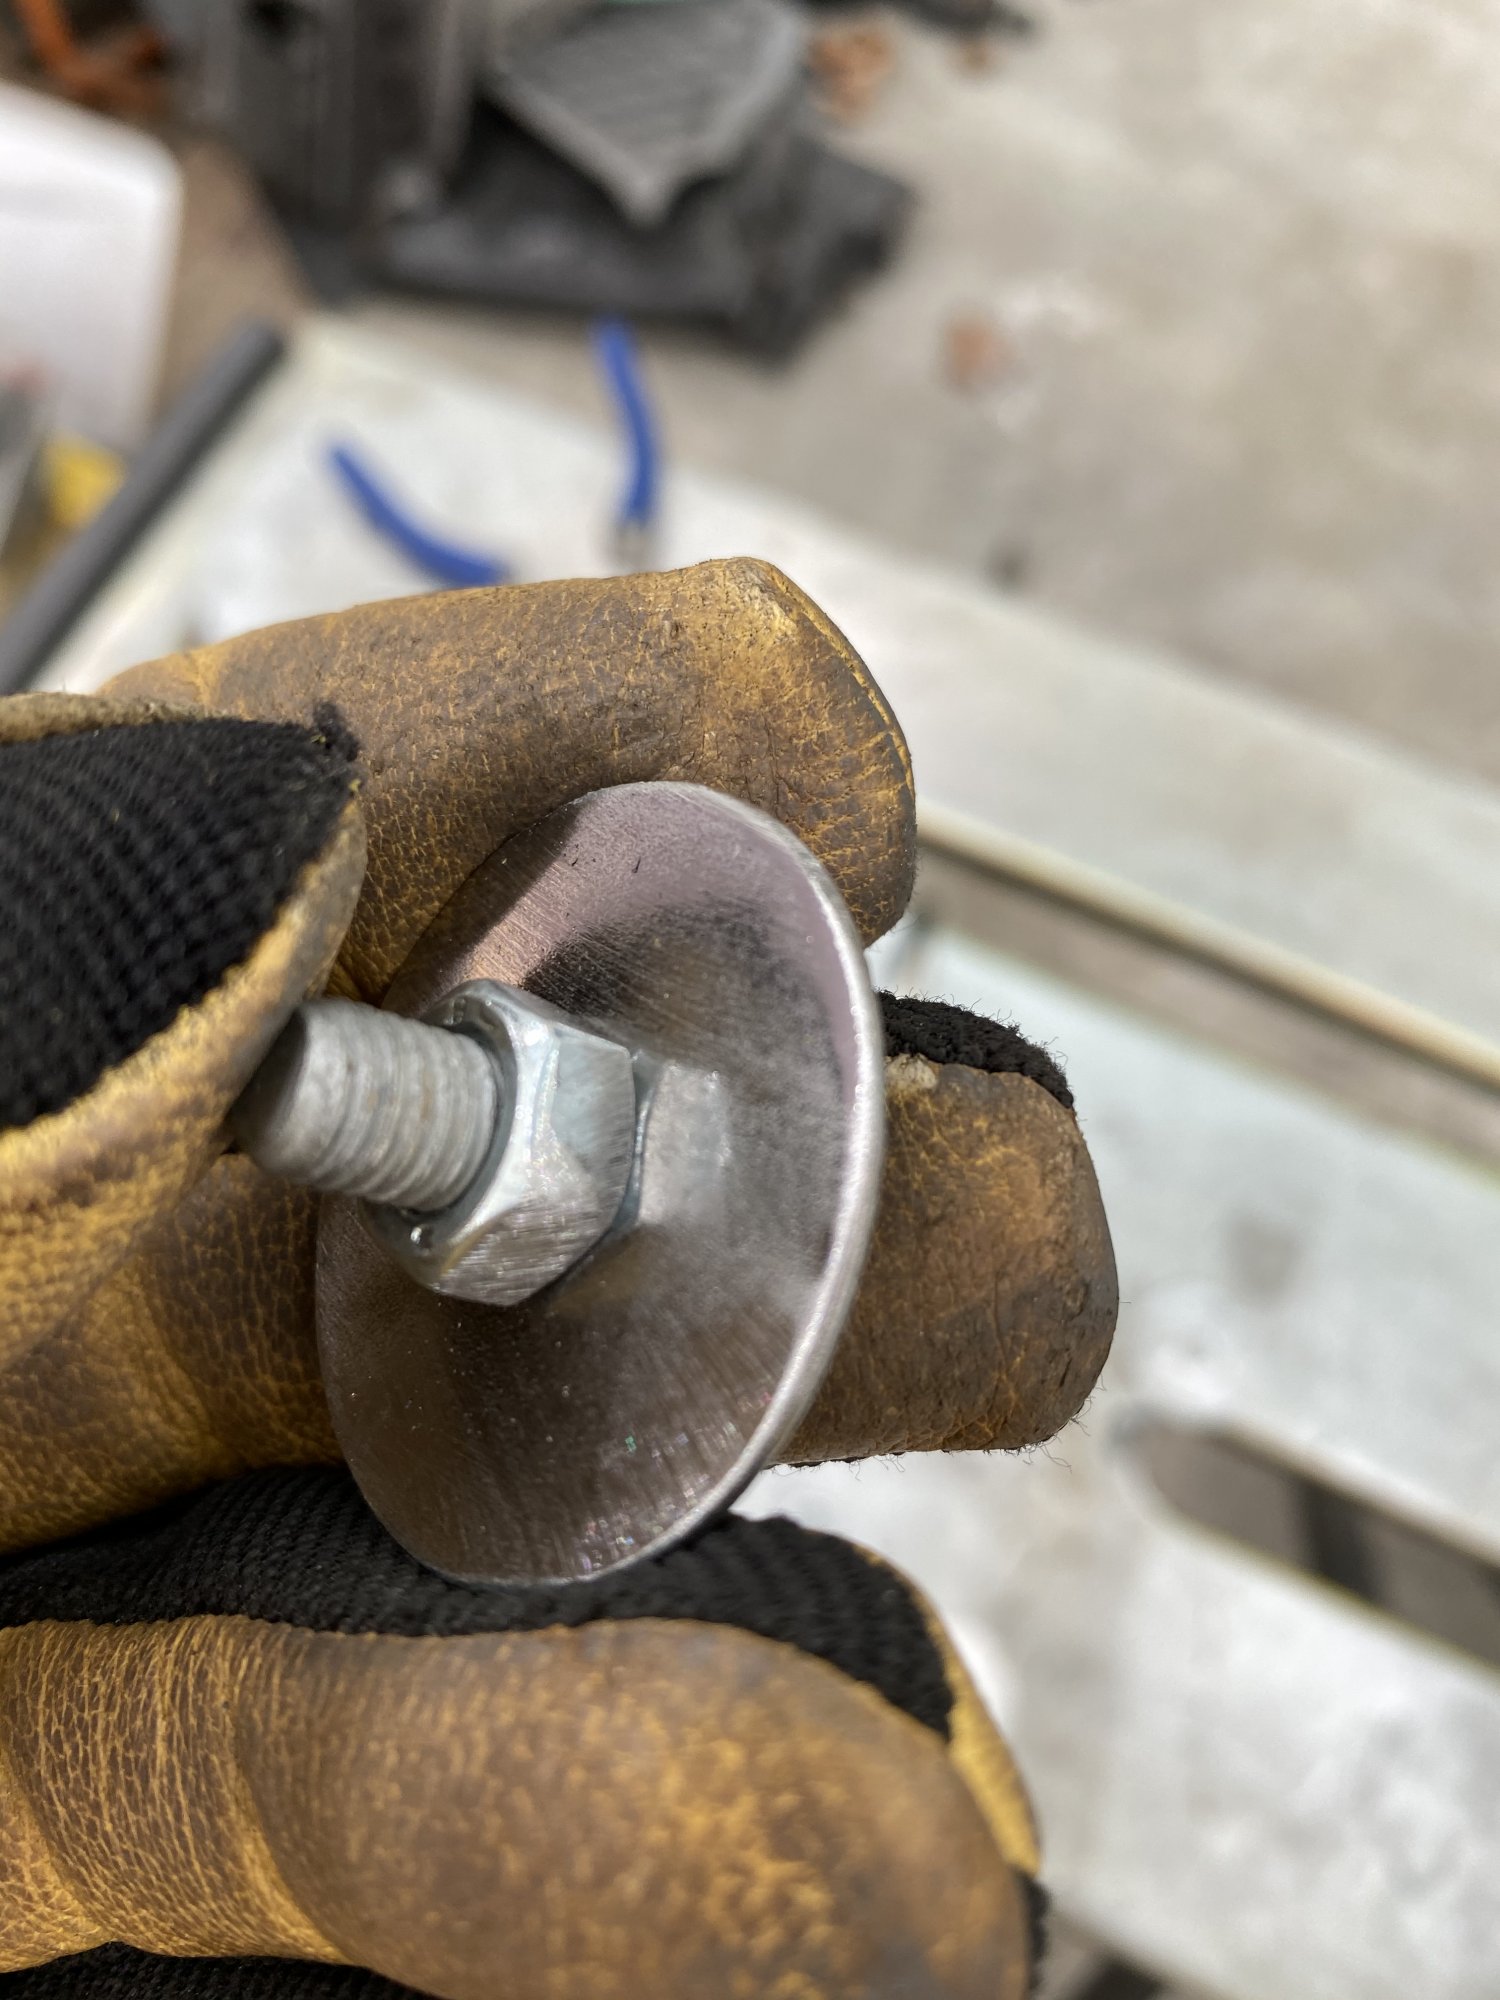
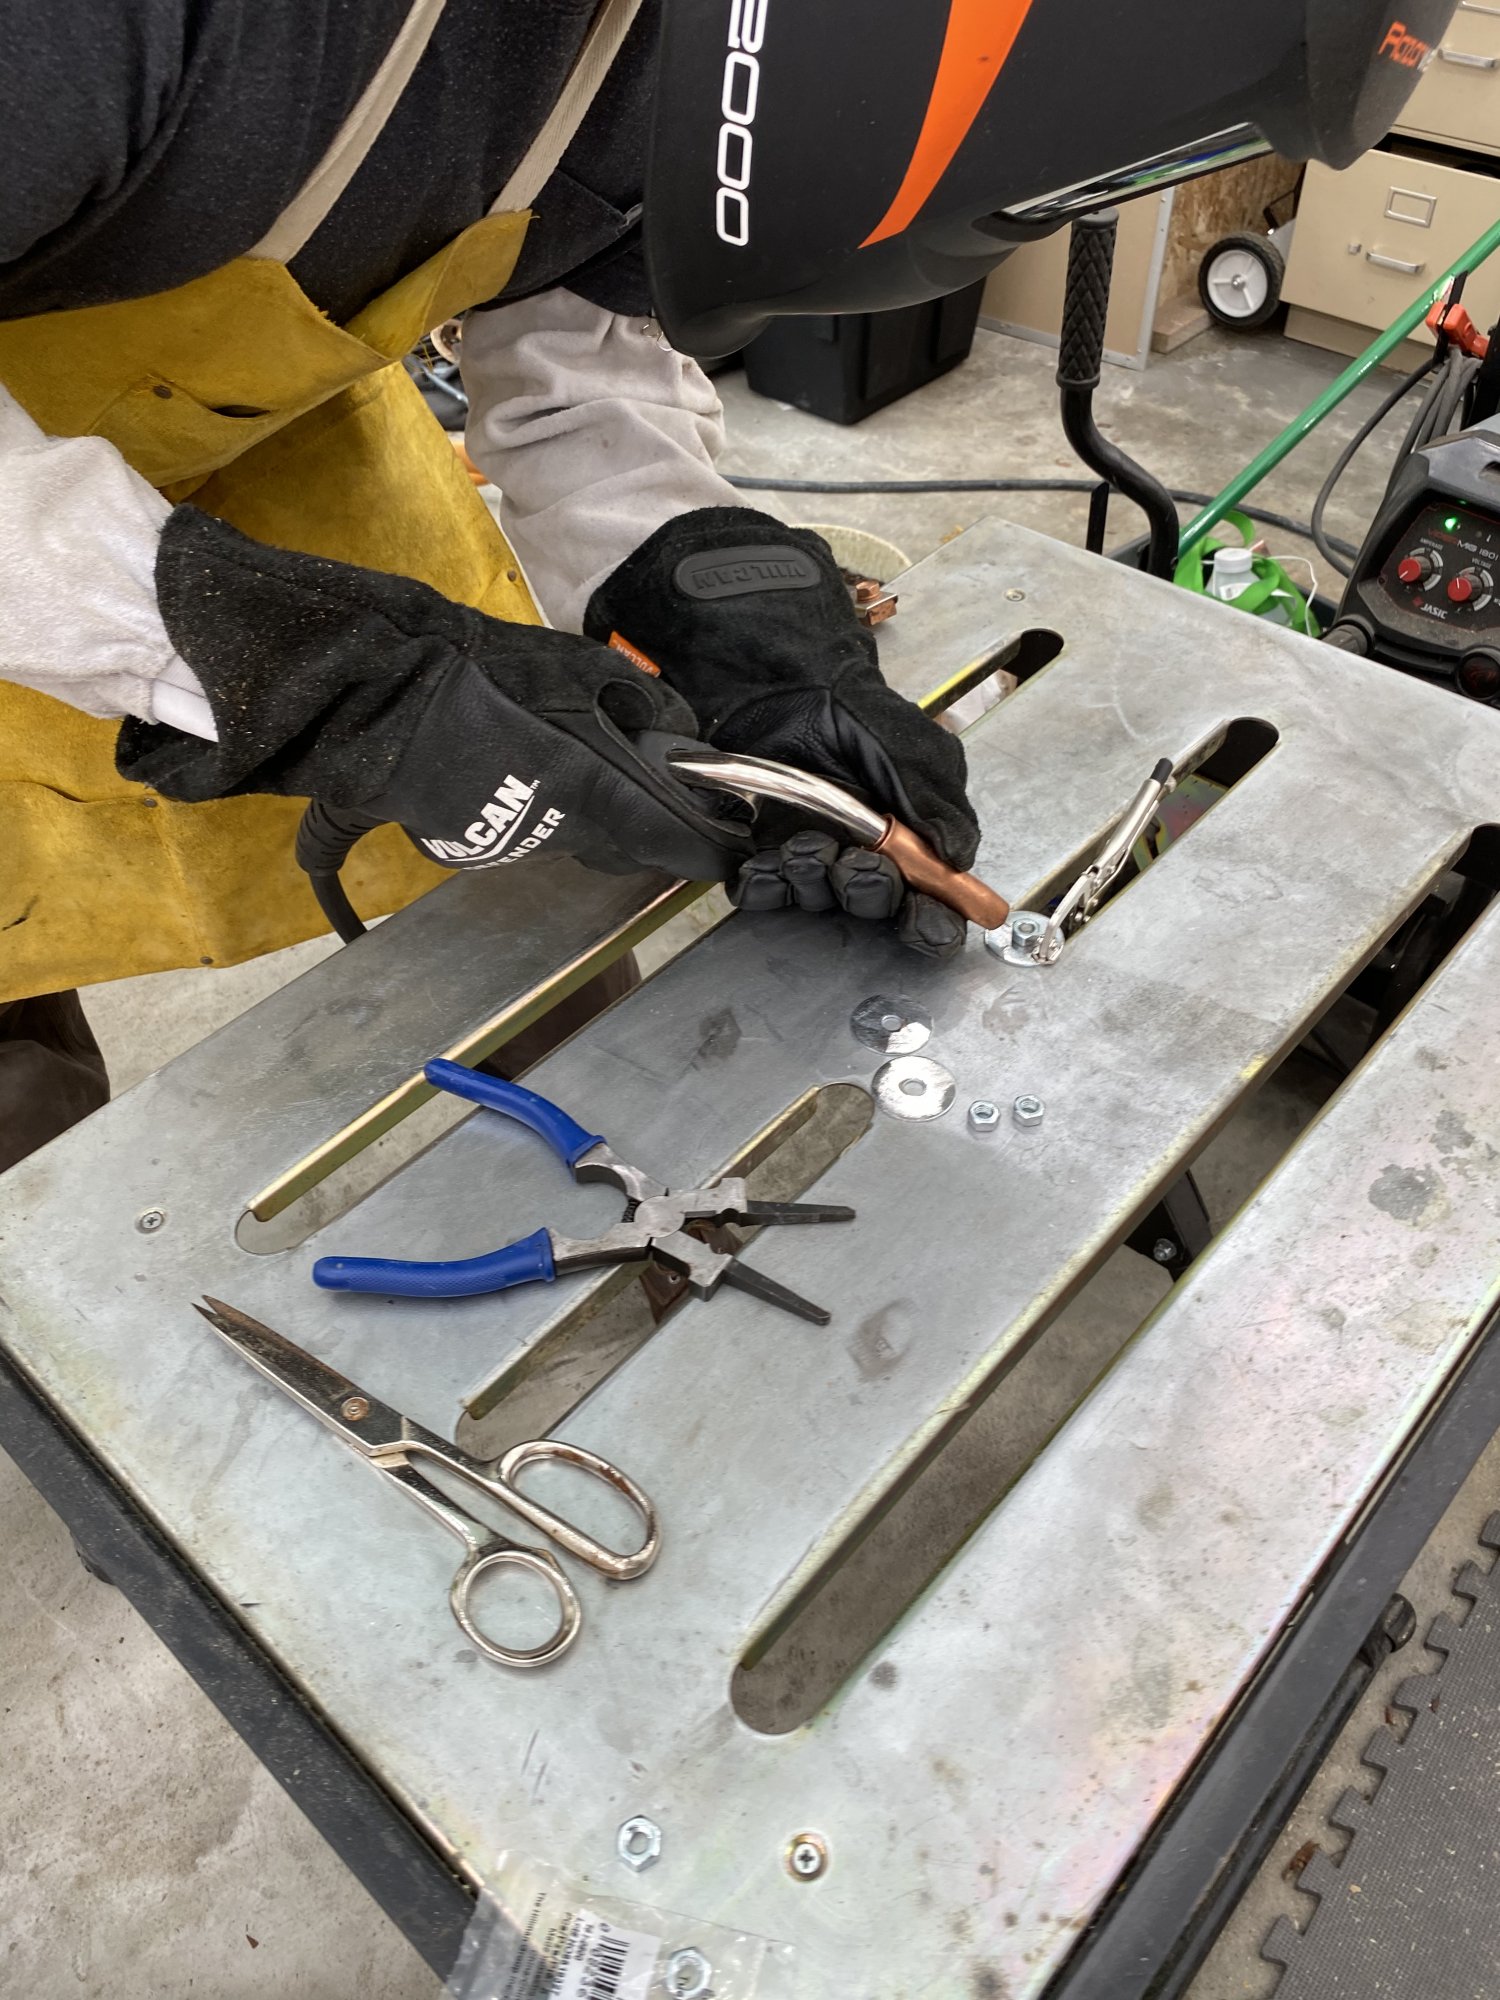
First step in fabricating our new hard points was to remove the nickel plate off the fender washers and the bolts so our weld would be strong. By screwing the nut securely to the washer, I can hold the nut to the washer right where it needs to be.
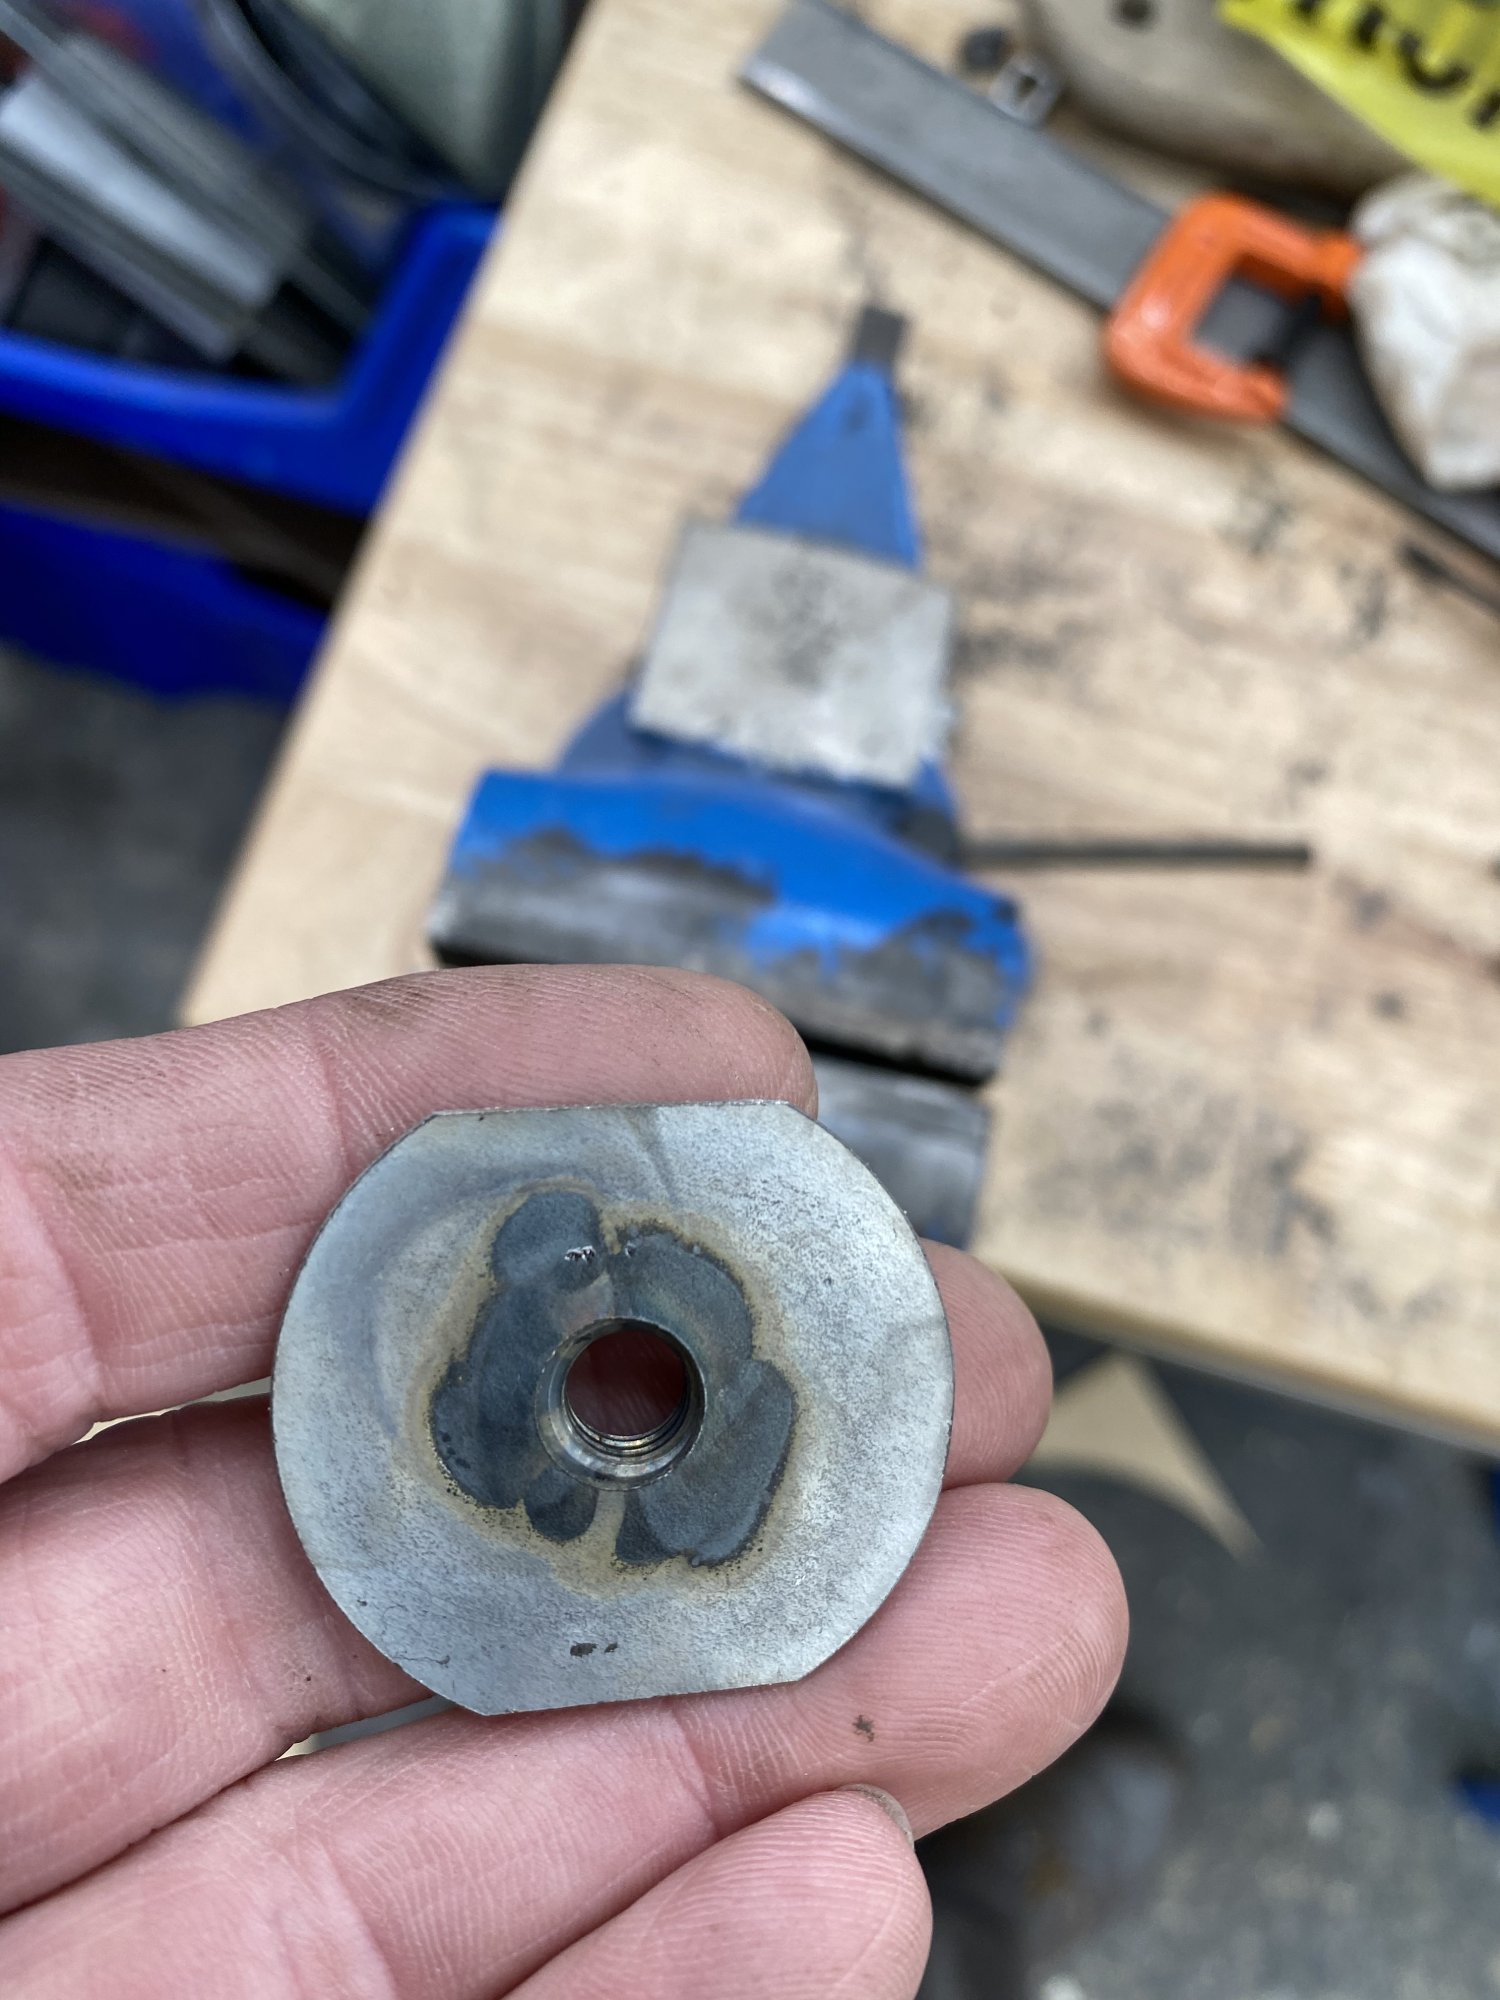
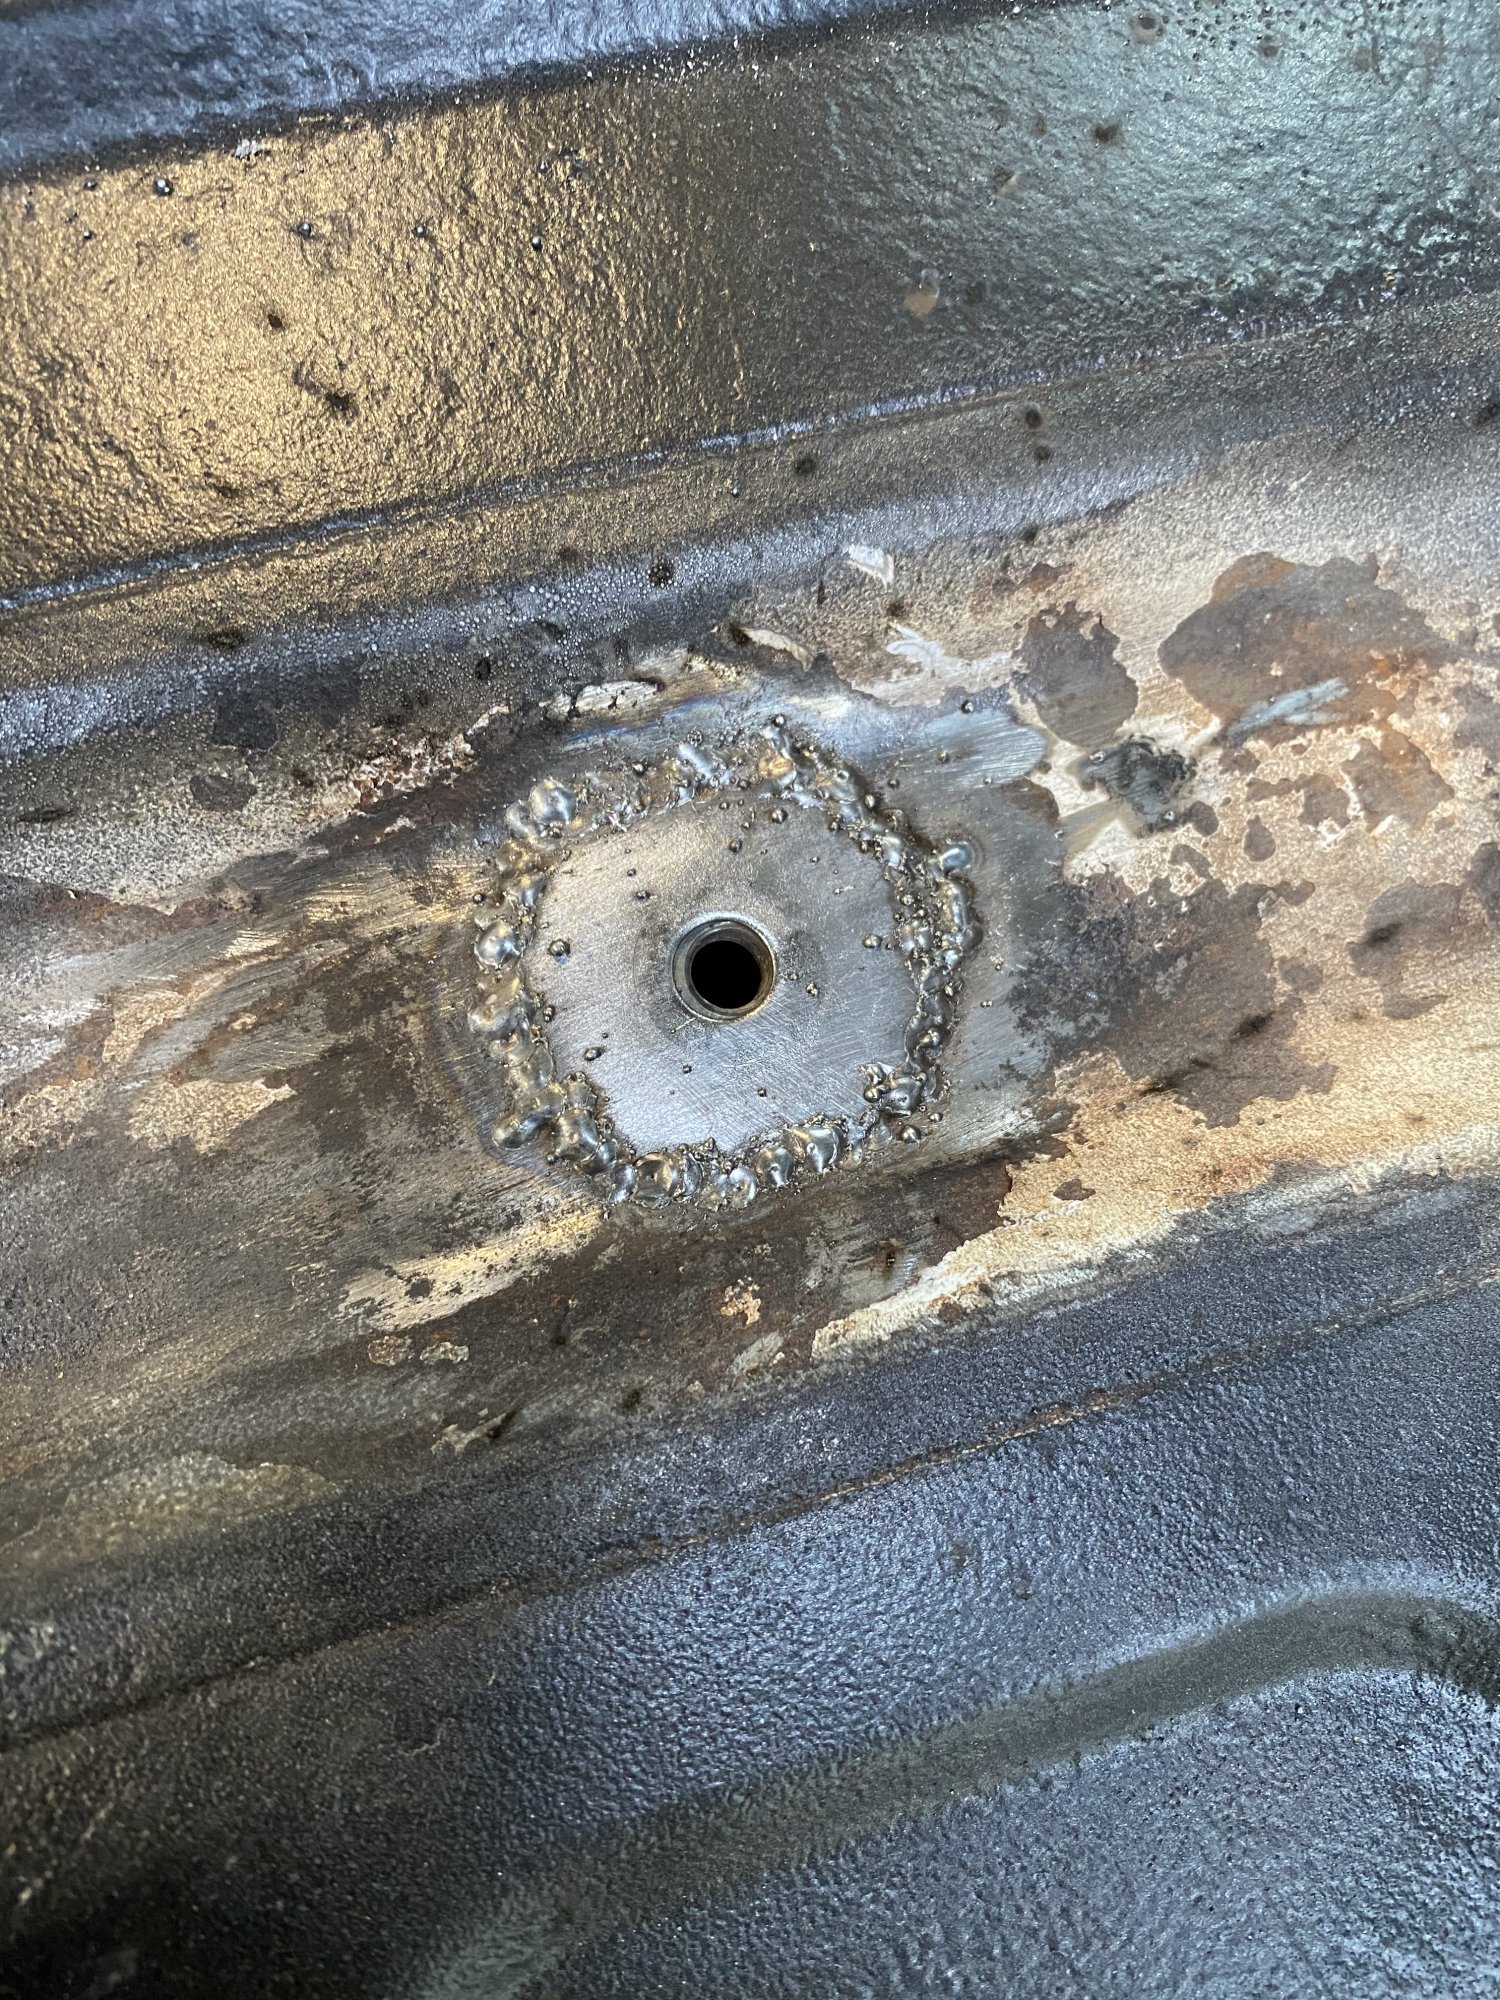
I used a number of tack welds to secure each face of the hex nut to the washer, taking time to cool the work with compressed air to prevent too much warping. I then came back around the nut with a good bead to completely weld the two parts together.
The 1-1/2” diameter of the fender washer was a little too wide to rest flush in the recess of the van floor so I removed approximately 1/8” from either side of the washer. This allowed for a very nice fit.
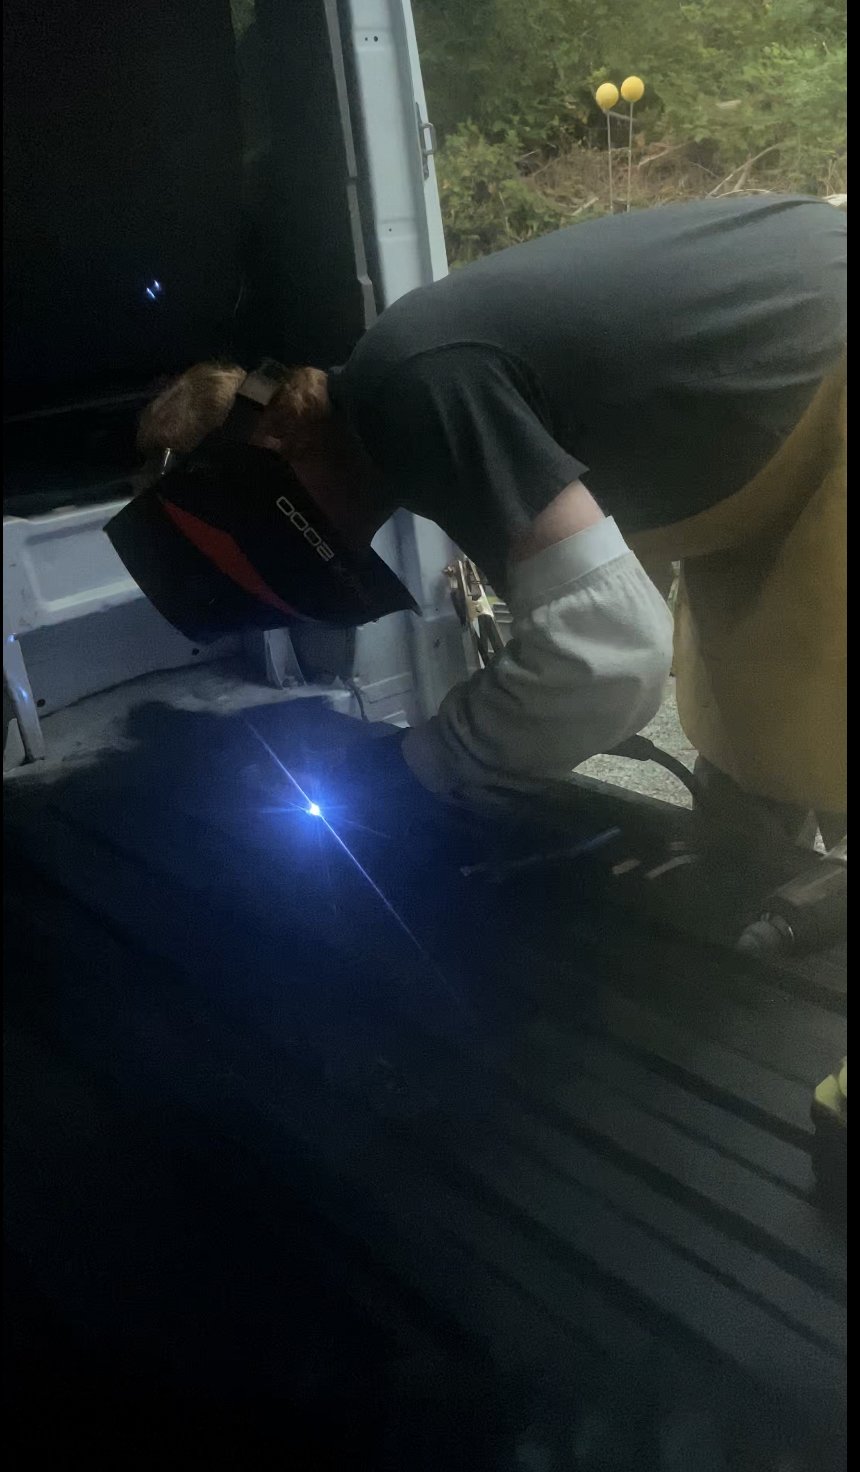
I aligned the new hard points, hex nut side down in the cleaned out holes, holding in place with my welders piers, made the first few tack welds. (Important Note: Make sure you know what is BELOW where you intend to weld on your van. You don’t want to melt wires or burn into your fuel tank. That could be very bad.) By working my way around the perimeter of each fender washer, leaving 1/2” or so of space between each tack weld, I was allowing the metal of the van floor to cool enough to prevent warping or burn through before coming back around. I kept adding tack points until there was a constant weld around the entire perimeter of the washer.
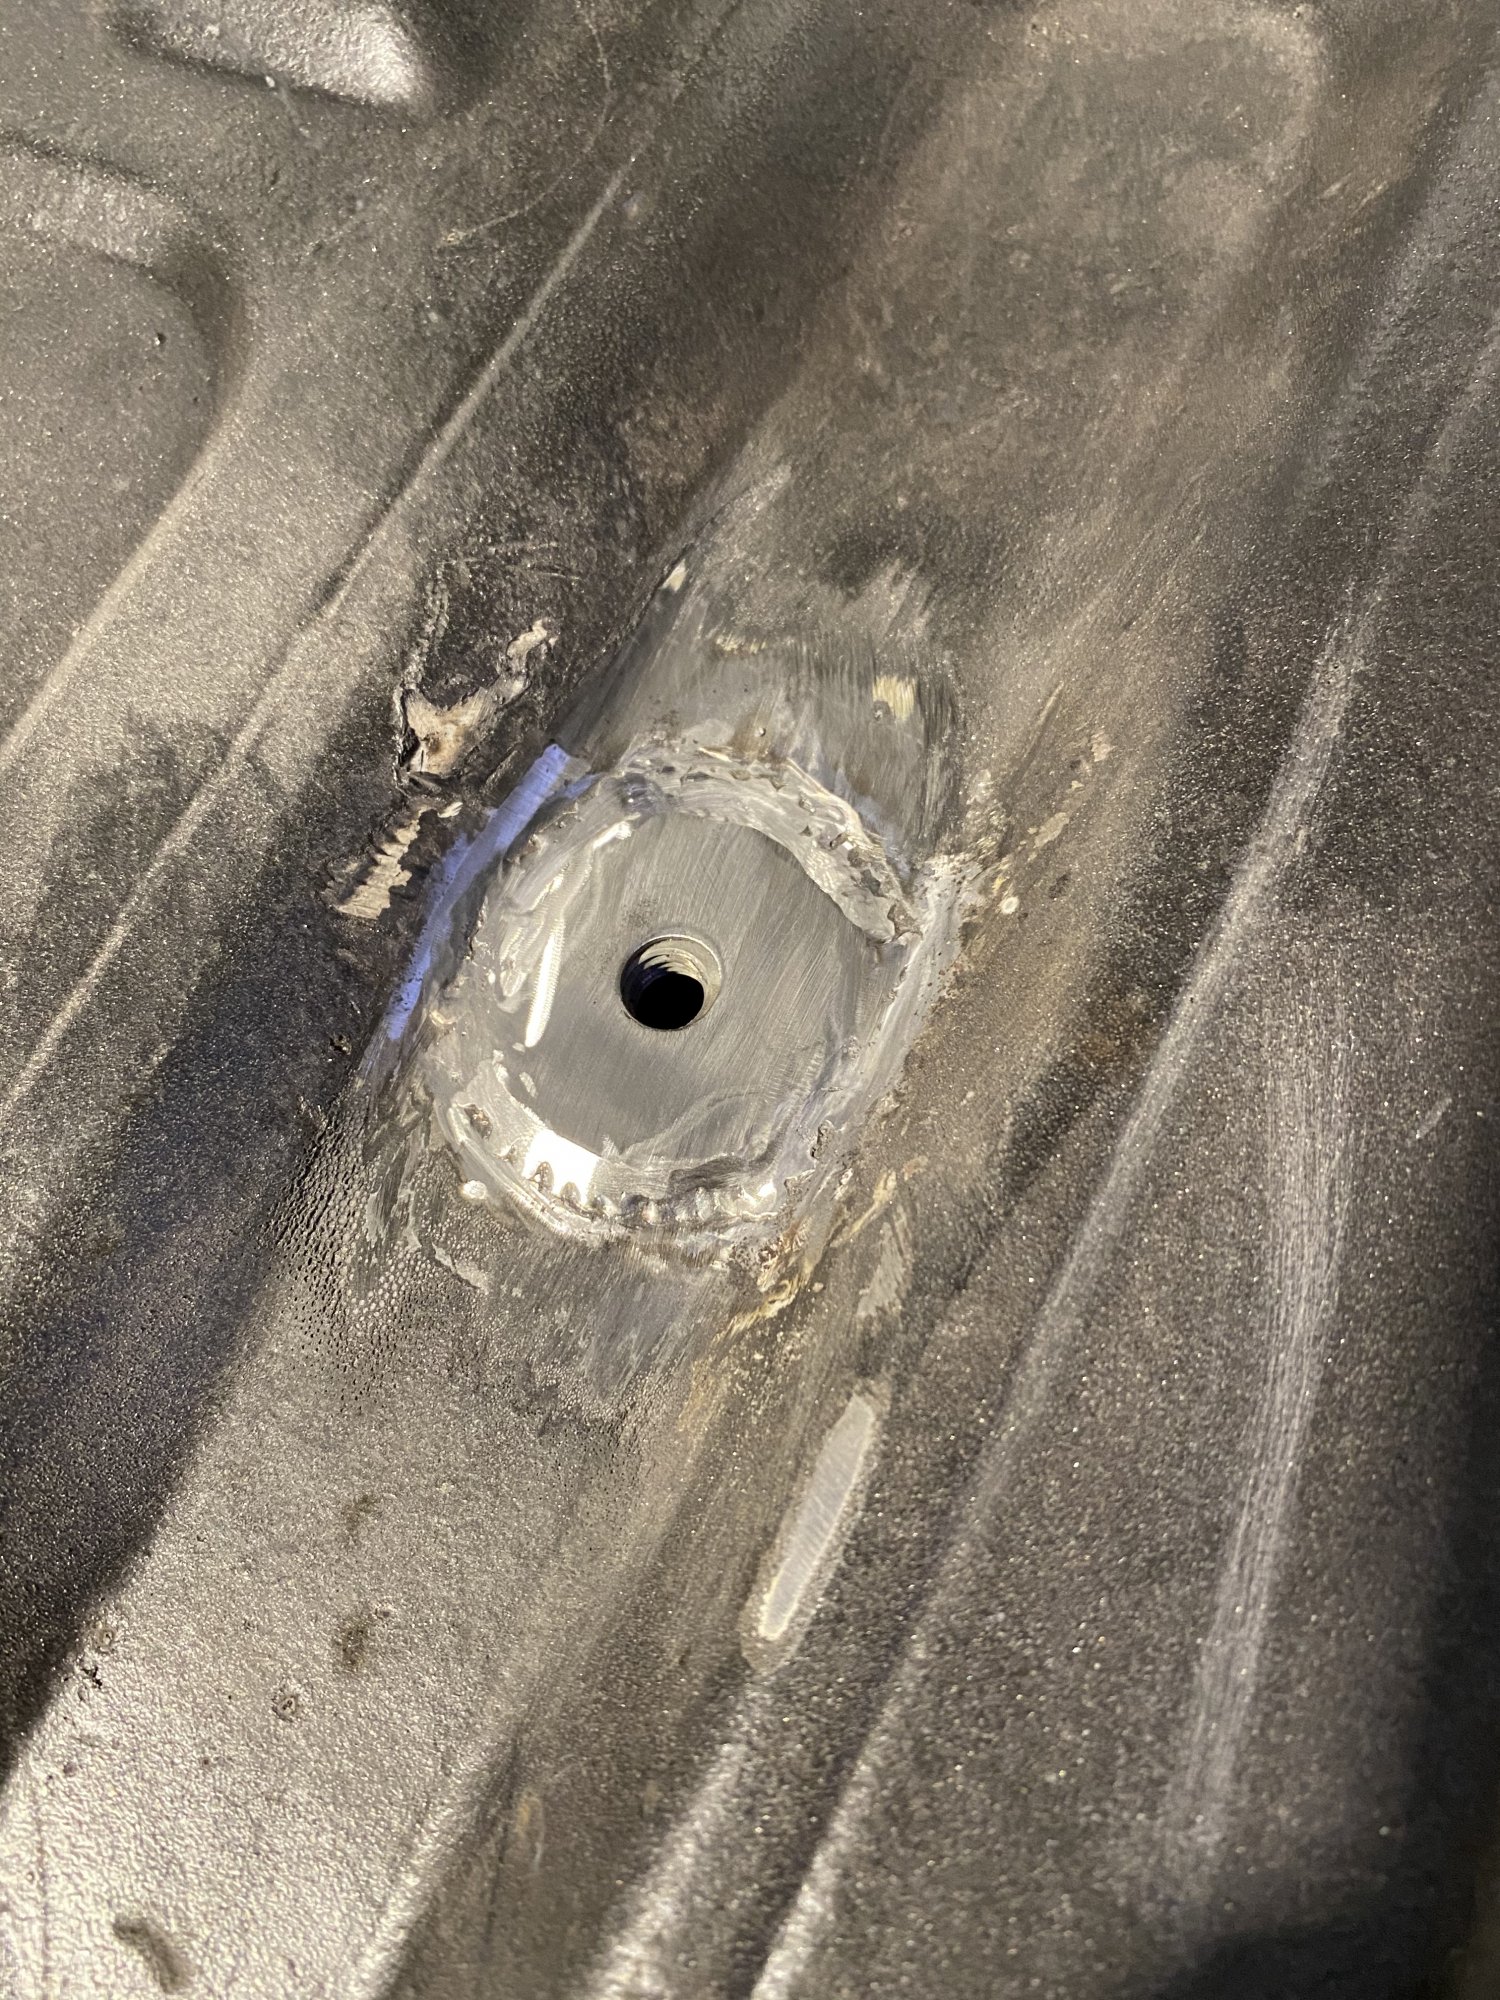
Making a bunch of tack welds is not near as clean of a weld finish as constant flow weld but the metal is too thin to perform any other way. Using the grinder and a drum sander on a Dremel tool, any high spots of the weld are removed.
Now that all points are installed and cleaned, I will treat the steel with a rust inhibitor and touch up with paint and spray on bed-liner. We how have our hard mount points back in place and ready to put to work.
IMPORTANT: As with all projects, repairs and modifications, make sure you have adequate skills, the right tools, good materials, safe practices to include PPE and approved extinguisher when welding. Ensure your van battery is disconnected and that you have a good grounding point for your welder.